How to Clean Carrier Air Conditioner: A Step-by-Step Guide
To clean a Carrier air conditioner, first, disconnect the power and remove the control panel and top cover. Next, clean the coils, wiring, condenser, fan, and top of the unit.
Finally, test the unit to ensure it is working properly. Alternatively, if you have a split type aircon, gently lift and remove the front panel, slide out the main air filter, shake off excess water, allow the filter to dry, clean the fins with a vacuum cleaner, clean the front panel with a soft dry cloth, and slide the filters back in.
Remember, if you need professional help, book a service later on. Cleaning your Carrier air conditioner is important for maintaining its efficiency and preventing the buildup of dirt and debris that can affect its performance.
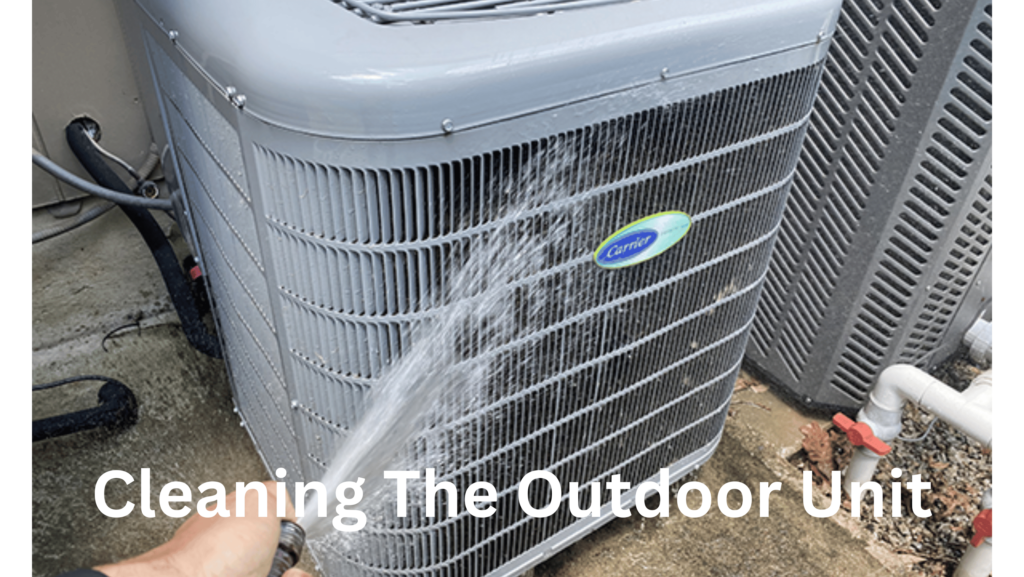
Cleaning The Outdoor Unit
|
Cleaning The Indoor Unit
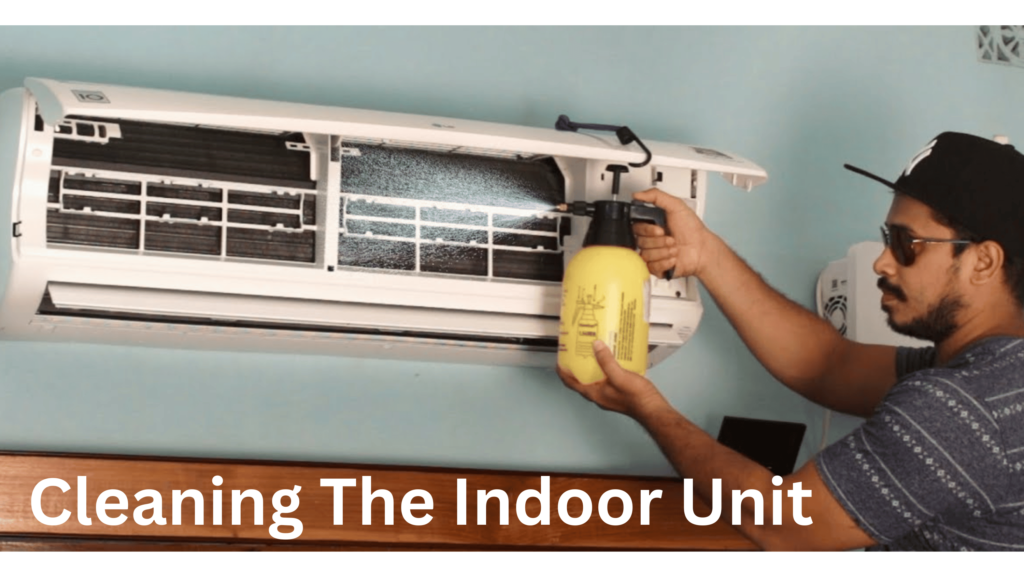
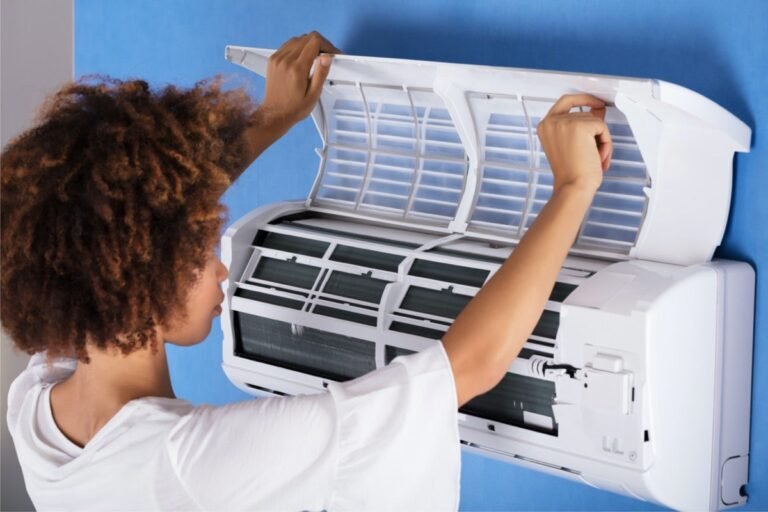
To clean the indoor unit of your Carrier air conditioner, there are several steps you need to follow. First, remove the control panel by gently lifting and sliding it out. Next, remove the top cover to access the internal components. Clean the coils using a coil cleaner to remove any dirt or debris. Then, clean the wiring carefully to ensure it is free from dust and dirt. Don’t forget to clean the condenser and the top of the unit as well. Finally, clean the fan to ensure proper airflow. After cleaning, test the unit to make sure it is functioning properly.
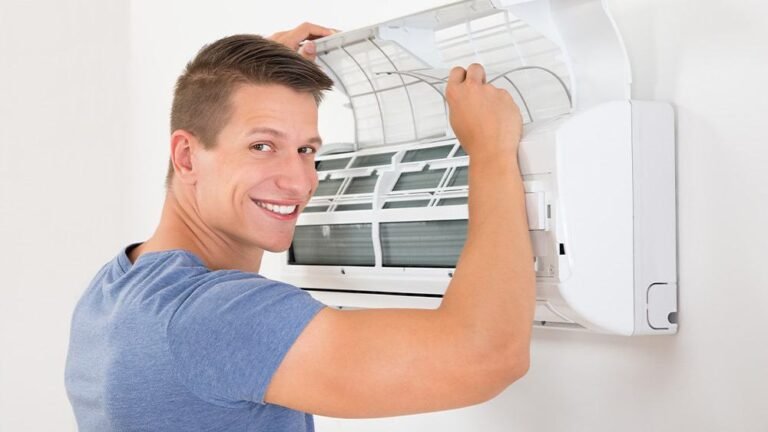
Cleaning The Front Panel And Air Filter
| To properly clean your Carrier air conditioner, follow these steps: |
| 1. Gently lift and remove the front panel of the air conditioner. |
| 2. Carefully slide out the main air filter. |
| 3. Lightly shake the main filter to remove excess water and allow it to dry. |
| 4. While waiting for the air filter to dry, clean the fins with a vacuum cleaner, being careful not to touch them. |
| 5. Clean the front panel with a soft, dry cloth. |
| 6. Slide in the special filters. |
| 7. Slide the main air filter back in. |
| 8. Book a professional service later on for a thorough cleaning and maintenance. |
Cleaning The Condenser Coil
When it comes to cleaning the condenser coil of your Carrier air conditioner, there are a few important steps to follow. First, you need to disconnect the power to ensure your safety. Next, you’ll need to gain access to the interior of the unit by removing the control panel and the top cover. Once inside, inspect the inside of the unit for any debris or signs of damage. Inspect the fins carefully and conduct a flashlight test to identify any blockages. After that, choose an appropriate cleaner for the coil and proceed to clean it thoroughly.
After cleaning the coil, re-inspect the fins to ensure they are clean and free from any obstructions. Finally, reassemble the unit by putting the top cover and control panel back in place. It’s important to follow these steps to keep your Carrier air conditioner running efficiently and to prolong its lifespan. Remember to consult the manufacturer’s guidelines for specific instructions on cleaning your specific model of Carrier air conditioner.
Best Ac Coil Cleaners
| Best AC Coil Cleaners |
|---|
| Frost King Air Conditioner Coil Cleaner |
| Purafilter Coil Cleaner |
| AC-Safe Air Conditioner & Coil Cleaner |
| Air-Care Air Conditioner Coil Cleaner |
| Air conditioner evaporator coil |
| Lowes AC coil cleaner |
| DiversiTech Clear Foam Coil Cleaner |
To clean your Carrier air conditioner, start by gently lifting and removing the front panel. Carefully slide out the main air filter and lightly shake it to remove excess water. Allow the filter to dry while you clean the fins with a vacuum cleaner, being careful not to touch them. Clean the front panel with a soft dry cloth and then slide in any special filters. Slide the main air filter back in and book a professional service later on for complete maintenance. If the coils are coated with dirt or lint, vacuum them with a soft brush attachment. For oil or grease, use a mild detergent and water solution, being careful not to splash water on insulation. Inspect the drain pan and condensate drain when checking the cooling coil. For an outdoor unit, keep landscaping away and clean the unit regularly.
You May Also Like to READ:
How to Determine AC Tonnage From Model Number Carrier: Expert Tips
Why is My Carrier AC Not Working? Troubleshooting Tips.
Carrier Air Conditioner Leaking Water: Troubleshooting Tips to Fix the Issue!
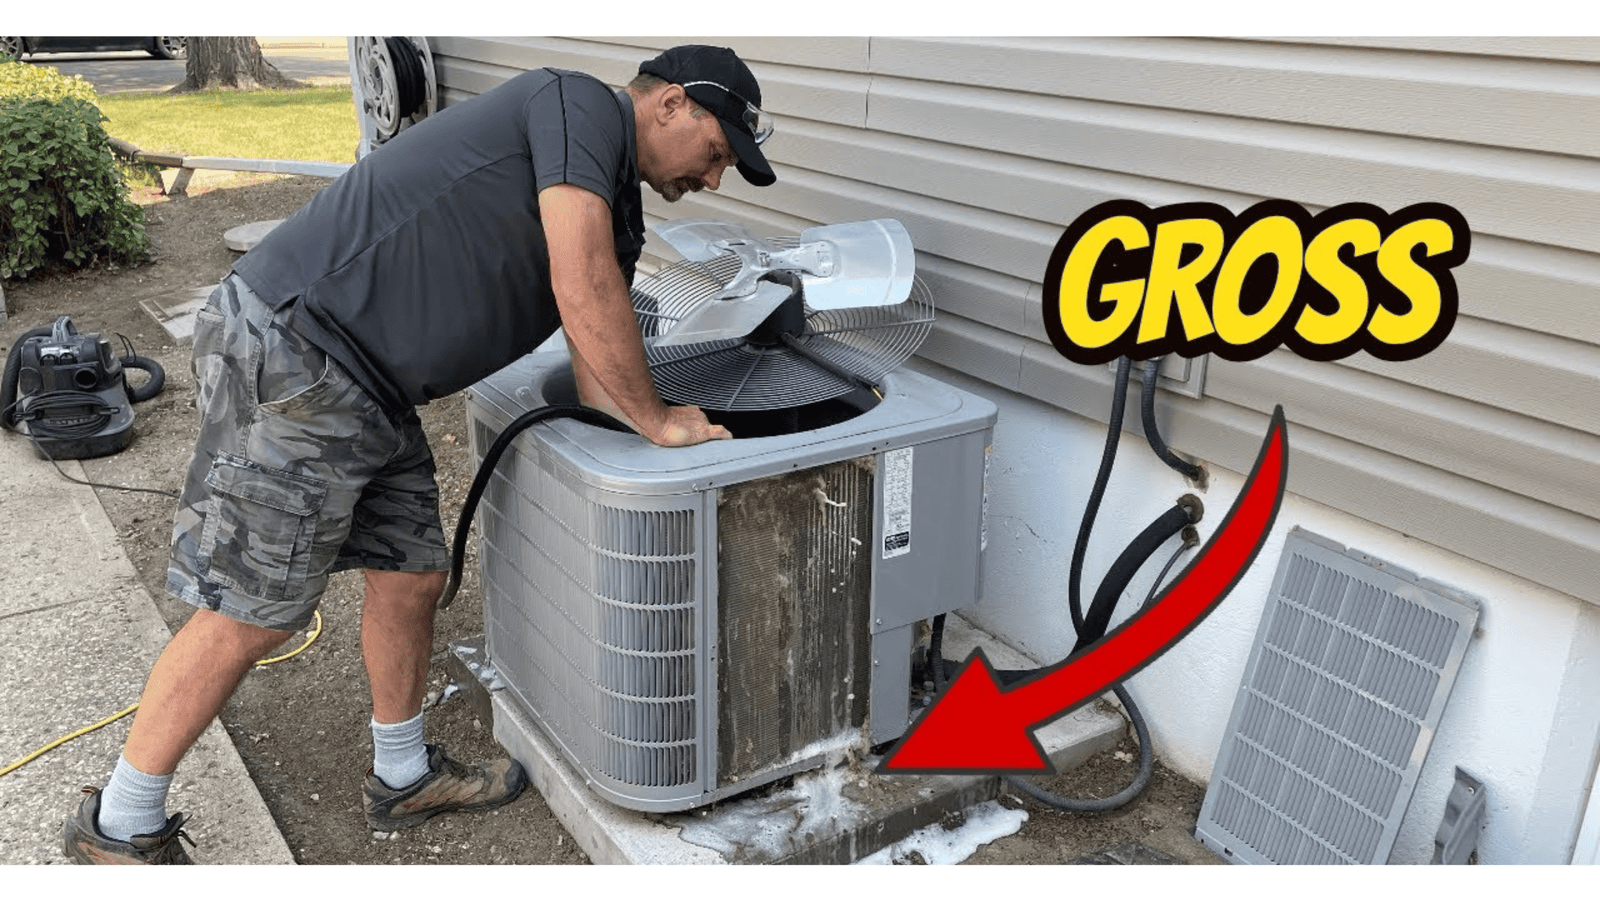
Tips For Cleaning Outdoor Carrier Air Conditioner
Clean Carrier Air Conditioner
Tips for Cleaning Outdoor Carrier Air Conditioner:
– Vacuum the coils with a soft brush attachment
– Clean any oil or grease with a mild detergent and water solution
– Be cautious to avoid splashing water on insulation
– Inspect the drain pan and condensate drain simultaneously
Cleaning an outdoor Carrier air conditioner is essential for its optimal functioning. To start, **vacuum the coils** using a soft brush attachment. This will remove any dirt or lint that may have accumulated on them. If the coils are coated with **oil or grease**, you will need to clean them using a mild detergent and water solution. Rinse them thoroughly after cleaning.
While cleaning, always **be cautious not to splash water on the insulation** surrounding the air conditioner. Lastly, it’s important to **inspect the drain pan and condensate drain** simultaneously with the cooling coil check. Any signs of clogging or leaks should be addressed promptly to prevent further damage to the unit.
Regular cleaning and maintenance of your outdoor Carrier air conditioner will ensure its longevity and efficiency in keeping your space cool and comfortable.
Frequently Asked Questions On How To Clean Carrier Air Conditioner
How Do You Clean An Outdoor Carrier Air Conditioner?
To clean an outdoor carrier air conditioner, follow these steps: 1. Carefully remove any landscaping or debris around the unit. 2. Use a soft brush attachment on a vacuum to remove dirt or lint from the coils. 3. If the coils are coated with oil or grease, clean them with a mild detergent and water solution.
4. Rinse the coils and be careful not to splash water on insulation. 5. Inspect the drain pan and condensate drain while checking the cooling coil. 6. For filter cleaning, pop off the front cover, remove the air filters, and brush, shake, or vacuum debris out.
7. Clean the front panel with a soft dry cloth. 8. Slide in special filters and then slide the main air filter back in. 9. Book a professional service for additional cleaning if needed. Remember to protect the unit from any potential damage during the cleaning process.
How Do You Clean The Filter On A Carrier Air Conditioner?
To clean the filter on a Carrier air conditioner, carefully remove the front panel and slide out the main air filter. Lightly shake the filter to remove excess water and allow it to dry. While waiting for the filter to dry, clean the fins with a vacuum cleaner.
Clean the front panel with a soft dry cloth. Slide in the special filters and slide the main air filter back in. Book a professional service later on for thorough cleaning.
How Do You Remove The Front Cover Of A Carrier Air Conditioner?
To remove the front cover of a Carrier air conditioner, gently lift and remove the front panel. Then, carefully slide out the main air filter and shake it to remove excess water. Allow the filter to dry and clean the fins with a vacuum cleaner.
Clean the front panel with a soft dry cloth and slide in the special filters. Finally, slide the main air filter back in place. Remember to book a professional service later on if needed.
How Do I Clean My Air Conditioner Myself?
To clean your air conditioner yourself, follow these steps: 1. Turn off the power to the unit. 2. Remove the front panel and main air filter. 3. Shake off excess water from the main filter and let it dry. 4. Use a vacuum cleaner to clean the fins, being careful not to touch them.
5. Clean the front panel with a soft dry cloth. 6. Slide in the special filters and put the main air filter back. 7. Book a professional service for later maintenance. Remember to handle the cleaning process gently and ensure the unit is dry before reassembling.
How Often Should I Clean My Carrier Air Conditioner?
It is recommended to clean your Carrier air conditioner at least once a year to maintain optimal performance and efficiency.
What Supplies Do I Need To Clean My Carrier Air Conditioner?
To clean your Carrier air conditioner, you will need a soft brush attachment for vacuuming, a mild detergent, water solution, a cloth for cleaning, and a brush for removing debris from the filters.
Can I Clean The Outdoor Unit Of My Carrier Air Conditioner?
Yes, you can clean the outdoor unit of your Carrier air conditioner. Use a soft brush attachment to vacuum dirt or lint from the coils. For oil or grease, use a mild detergent and water solution.
How Do I Clean The Filters On My Carrier Air Conditioner?
To clean the filters on your Carrier air conditioner, simply pop off the front of the unit, remove the filters, and brush, shake, or vacuum any debris out of them. Ensure all the debris is removed for optimal air flow.
What Should I Do If Water Gets On The Insulation While Cleaning My Carrier Air Conditioner?
If water splashes on the insulation while cleaning your Carrier air conditioner, gently pat it dry with a cloth. Make sure the insulation is completely dry before turning on the unit to prevent any damage.
Can I Use Any Cleaner For Cleaning The Condenser Coil On My Carrier Air Conditioner?
It is recommended to use a specific coil cleaner designed for air conditioners. Look for cleaners that are safe to use on aluminum coils, as they are commonly used in Carrier air conditioners.
Conclusion
To ensure that your Carrier air conditioner continues to perform at its best, regular cleaning is essential. By following the proper cleaning procedures, you can maintain the efficiency and effectiveness of your unit for years to come. Start by disconnecting the power and removing the control panel and top cover.
Clean the coils thoroughly, making sure to remove any dirt or debris that may have accumulated. Take the time to clean the wiring, condenser, and fan as well. Finally, test the unit to ensure it is working properly. Remember, it’s important to handle the cleaning process with care and avoid touching the fins or splashing water on insulation.
By booking a professional service later on, you can also ensure that your unit receives a comprehensive cleaning. With these steps, you can keep your Carrier air conditioner clean and efficient, allowing it to provide you with cool and fresh air for years to come.
Invest a little time and effort into cleaning your unit regularly, and you’ll reap the rewards in terms of improved performance and energy efficiency.